Operation Instruction
Rotate the magnetic ring to select the wanted output level. From left to right, there are five output levels: Battery level, Red light, Off, Low and High.
Battery Level Indicator
When rotating the magnetic ring to the battery level output, there are three states: red light constant-on displays sufficient power level, red light slow flash displays poor battery level, red light quick flash displays critical battery level.
Low-voltage Protection
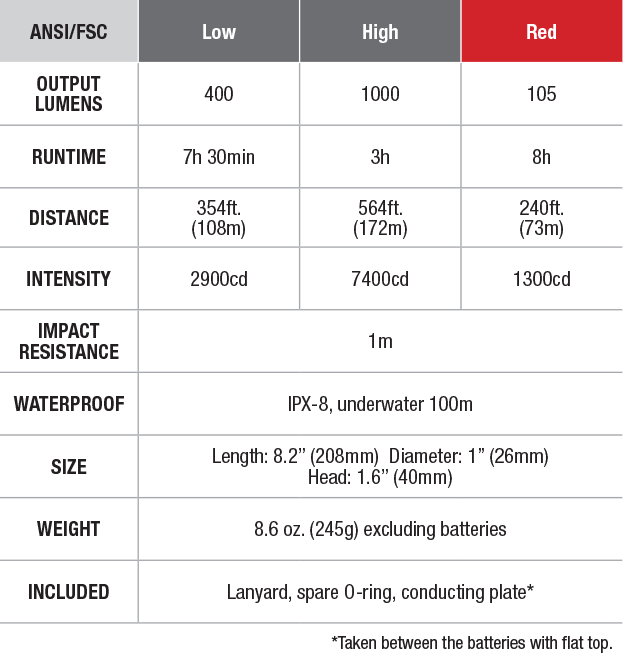
- When the light works at High output, if the detected voltage is lower than the preset voltage of 6.2V, the output will automatically downshift to 400 Lumens.
- When the light works at High or Low output, if the detected voltage is lower than the preset voltage of 6.0V, the output will automatically downshift to 100 Lumens.
- When the light works at the Red light mode, if the detected voltage is lower than the preset voltage of 6.0V, the output will automatically downshift to 25 Lumens.
Intelligent Over-heat Protection
The light will accumulate a lot of heat when it is working at High output. When the light is overheated internally up to 65 ℃ or above, the flashlight will automatically adjust the output to prevent the light from overheating.
Battery Replacement
Unscrew the tail cap to insert the battery with the anode side (+) towards the light head, and then screw the tail cap.
Usage and Maintenance
- Disassembling the sealed head can cause damage to the light and will void the warranty.
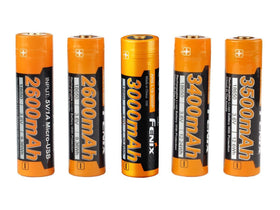
- Fenix recommends using excellent quality batteries. If the lamp will not be used for an extended period, remove the battery, or the lamp could be damaged by electrolyte leakage or battery explosion.
- Long-term use can result in O-ring wear. To maintain a proper water seal, replace the ring with an approved spare.
- Periodic cleaning of the battery contacts improves the lamp's performance as dirty contacts may cause the lamp to flicker, shine intermittently or even fail to illuminate for the following reasons:
Reason A: The batteries need replacing.
Solution: Replace batteries (Please confirm the correct installation of anode and cathode).
Reason B: The threads, PCB board contact or other contacts are dirty.
Solution: Clean the contact points with a cotton swab soaked in rubbing alcohol. If the above methods don't work, please refer to the warranty policy before contacting your authorized distributor.


