Operating Instructions of the The Fenix WT25R Adjustable Head Flashlight
On/off
With the light switched off, press and hold the switch for 0.5 seconds to turn on the light.
With the light switched on, press and hold the switch for 0.5 seconds to turn off the light.
Output Selection of the Fenix WT25R Adjustable Head Flashlight
In general mode, single click the switch to cycle through Low→Med→High→Turbo.
In flash mode, single click the switch to cycle through Strobe→SOS.
Mode Switching
In general mode, press and hold the switch for 1.2 seconds to enter strobe of flash mode.
In flash mode, press and hold the switch for 1.2 seconds to enter the last used output of general mode.
Lock/Unlock
Lock: with the light unlocked and switched off, double click the switch to lock the light, the light will blink twice on Low to indicate locked status.
Unlock: with the light locked and switched off, double click the switch, the light will be unlocked and activated on Low.
In locked status, clicking or pressing the switch will activate 2 one-second blinks on Low to indicate locked status.
Intelligent Memory Circuit
The light memorizes the last selected output of general mode. When turned on again the previously used output of general mode will be recalled. Each time the flash mode is entered with strobe.
Battery Level Indication of the Fenix WT25R Adjustable Head Flashlight
With the light switched off, single click the switch to check the battery status, the indicator will last for 5 seconds.
- Four lights on: 100% - 80%
- Three lights on: 80% - 60%
- Two lights on: 60% - 40%
- One light on: 40% - 20%
- One light flashes: 20% - 0%
Magnetic Charging
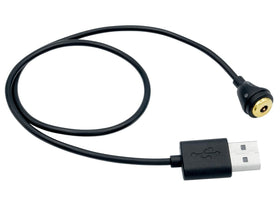
- When charging is needed, connect the USB A port of the charging cable to a USB power source, then hold the magnetic end of the charging cable close to the flashlight. The charging cable will attach to the charging port automatically and charging will begin. The indicator on the charging cable will be on and display red to indicate charging status, when the indicator turns green, the charging is completed.
- Recharge a stored light every four months to maintain optimal battery performance.
Note: The normal charging time is approximately 4 hours and 30 minutes of the included Fenix ARB-L18-3400 rechargeable Li-ion battery from depletion to full charging.
Battery Specifications
| Type | Dimensions | Nominal Voltage | Recommended |
| Rechargeable Li-ion battery | 18650* | 3.6V | Fenix ARB-L18 Series |
Warning: *18650 Li-ion batteries are powerful cells designed for commercial applications and must be treated with caution and handled with care. Only use quality batteries with circuit protection will reduce the potential for combustion or explosion; but cell damage or short circuiting are potential risks the user assumes.
Battery Replacement
Loosen the lock catch and open the tail cap to insert the battery with the anode side (+) towards the light head, then close the tail cap and fasten the lock catch.
Intelligent Overheat Protection
The light will accumulate a lot of heat when used on Turbo output level for extended periods. When the light reaches a temperature of 60°C or above, the light will automatically step down a few lumens to reduce the temperature. When the temperature drops below 60°C, it will then allow the user for the reselection of Turbo mode.
Low Voltage Warning
When the voltage level drops below the preset level, the flashlight is programmed to downshift to a lower brightness level until Low output is reached. When this happens in Low output, one of the battery level indicators blinks to remind you to recharge or replace the battery.
Usage and Maintenance of the Fenix WT25R Adjustable Head Flashlight
- Disassembling the sealed head can cause damage to the light and will void the warranty.
- Fenix recommends using an excellent quality battery.
- If the light will not be used for an extended period, remove the battery, or the light could be damaged by electrolyte leakage or battery explosion.
- Lock the light or remove the battery to prevent accidental activation during storage or transportation.
- Long-term use can result in O-ring wear. To maintain a proper water seal, replace the ring with an approved spare.
- Periodic cleaning of the battery contacts improves the lamp's performance as dirty contacts may cause the lamp to flicker, shine intermittently or even fail to illuminate for the following reasons:
A: The battery needs replacing.
Solution: Replace battery pack /battery (Ensure battery is inserted according to the manufacturer’s specifications).
B: The threads, PCB board contact or other contacts are dirty.
Solution: Clean the contact points with a cotton swab soaked in rubbing alcohol.
If the above methods don't work, please contact your authorized distributor.
Warning
- This flashlight is a high-intensity lighting device capable of causing eye damage to the user or others. Avoid shining the flashlight directly into anyone's eyes.
- This flashlight will accumulate a lot of heat when used for extended periods, resulting in high temperature of the flashlight shell. Pay attention to safe use to avoid scalding.
- All information provided in this manual is subject to change without prior notice.


