Operation
The white light and colored light are controlled separately and can be turned on at the same time. The button with power icon controls the white LEDs and the button with C icon is for multi-color LED and the button with sun icon is for instant turbo and strobe function.
White light
ON/OFF
Press and hold the button with power icon for 0.5 seconds to turn the light on or off.
Output selection
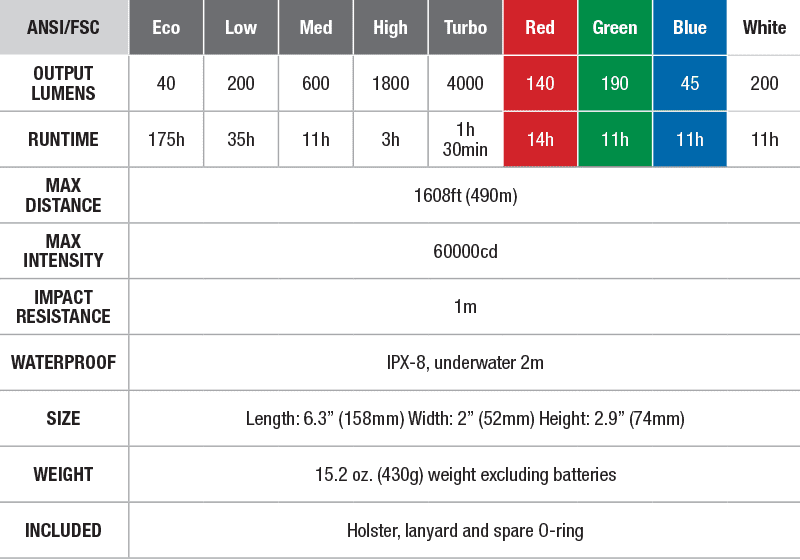
Press the button with power icon to cycle through five brightness levels in the order of Turbo>Eco>Low>Mid>High when the white light is turned on.
Colored light
ON/OFF
Press and hold the button with C icon for 0.5 seconds to turn the light on or off.
Output selection
Press the button with C icon to cycle through four output options in the order of Blue>Green>Red>White when the colored light is turned on.
Instant turbo
Press and hold the button with sun icon for 1 second to activate turbo mode directly. To return to previous condition, just press the button again.
Instant strobe
To activate strobe mode, just press the button with sun icon. It will flash between 6Hz and 15Hz every two seconds. Press the button again will return the light to previous condition.
Battery level indicator*
The battery level indicator lights up the multi-color LED for 3 seconds to show the remaining power of the batteries loaded. To activate the battery level indicator, just double press the C button when the light is turned off.
- Green LED constant-on: sufficient power level
- Blue LED constant-on: high power level
- Red LED constant-on: low power level
- Red LED flashing: critical power level
*The battery level indicator only supports 18650 Li-ion rechargeable batteries.
Intelligent memory circuit
The flashlight memorizes the last brightness level used but it will not remember strobe mode. The next time you turn the flashlight on, it will light up at the last used brightness level.
Over-heat protection
The light will accumulate a lot of heat when it is working at high lumen output levels. The flashlight will automatically adjust the output to prevent the light from overheating. If non-stop full output is needed, just press the power button again.
Battery Replacement
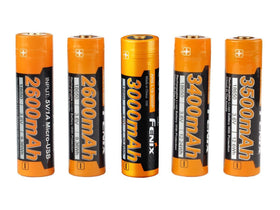
Unscrew the tail cap to insert the batteries with the anode side (+) toward the light head, screw the tail cap back on. The light can be powered by two 18650 batteries or four CR123A batteries loaded in the correct battery compartments (as the diagram below shows). Under this condition, only the corresponding LED will light up and the runtime of each brightness level remains the same but the output is reduced by half.
Usage & Maintenance
- Please don't disassemble the sealed head, doing so can cause damage to the flashlight and will void the warranty.
- We recommend the use of high quality battery. If the flashlight is not to be used for an extended period, remove the battery, or the flashlight could be damaged by electrolyte leakage or battery explosion.
- The flashlight may be accidentally activated when stored, transported or placed in a pocket. Unscrew the tail cap one-half turn or take out the battery to avoid unwanted operation.
- The O-ring may be worn out after using for a long time. If this happens, please replace the O-ring with a new one to keep the flashlight properly sealed against water.
- Please clean the contacts of your light from time to time, especially if the light flickers or doesn't light up. There may be several reasons for a flickering or not working light:
Reason A: The battery needs replacing.
Solution: Replace the battery (Please confirm the correct orientation of positive and negative ends).
Reason B: The threads, PCB board contact or other contacts are dirty.
Solution: Clean the contact points with an alcohol soaked cotton swab.
If the above methods don't work, please refer to the warranty policy.
Warning
LD75C is a high-intensity lighting device capable of causing eye damage. Avoid shining the light directly into anyone’s eyes.


