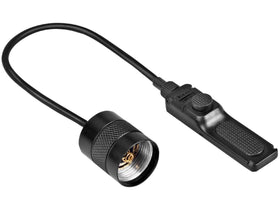
Dual Switches
The round switch is the tactical switch and the oval switch the functional switch.
ON/OFF
Tap the tactical switch to momentarily turn on the light; the light will activate last memorized output on White mode, or Red high on colored mode; release and the light will go out.
Fully press the tactical switch to constantly turn on the light. Press again to turn off the light.
With the light switched off, press the functional switch for instant strobe activation on White mode, or to enter Red high on colored mode; release it and the light will go out.
Strobe
With the light switched on on White mode - long press the functional switch to activate strobe. Click once again to return to previous output.
Output Selection
With the light on on White mode - single click the functional switch to cycle through Low→Med→High→Turbo.
With the light on on colored mode - single click the functional switch to cycle through Red High→Red Low→Blue.
Mode Switching
Rotate the light head to switch between white and colored light.
Intelligent Memory Circuit
The light memorizes the last selected brightness level on White light mode. When turned on again the previously used brightness level will be recalled.
Low-voltage Warning
When the voltage level drops below the preset level, the flashlight is programmed to downshift to a lower brightness level until Low output is reached. When this happens in Low output mode, the flashlight blinks three times every five minutes to remind you to replace the battery. To ensure normal use, the flashlight will not turn off automatically and will work till the battery runs out completely. (White light flashes on white light and Red flashes on colored light.)
Intelligent Overheat Protection
The light will accumulate a lot of heat when used on Turbo output level for extended periods. When the light reaches a temperature of 65°C or above, the light will automatically step down by a few lumens to reduce temperature. When the temperature is reduced, the output will gradually return to Turbo output level.
Battery Replacement
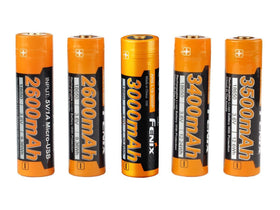
Unscrew the tail cap to insert the battery with the anode side (+) towards the light head, then screw the tail cap back on.
Usage and Maintenance
- Disassembling the sealed head can cause damage to the light and will void the warranty.
- Fenix recommends using an excellent quality battery.
- If the light will not be used for an extended period, remove the battery, or the light could be damaged by electrolyte leakage or battery explosion.
- Unscrew the tail cap half a turn or take out the battery to prevent accidental activation during storage or transportation.
- Long-term use can result in O-ring wear. To maintain a proper water seal, replace the ring with an approved spare.
- Periodic cleaning of the battery contacts improves the lamp's performance as dirty contacts may cause the lamp to flicker, shine intermittently or even fail to illuminate for the following reasons:
A: The batteries need replacing.
Solution: Replace batteries (Ensure batteries are inserted according to the manufacturer’s specifications).
B: The threads, PCB board contact or other contacts are dirty.
Solution: Clean the contact points with a cotton swab soaked in rubbing alcohol.
If the above methods don't work, please contact your authorized distributor.
Warning
This flashlight is a high-intensity lighting device capable of causing eye damage to the user or others. Avoid shining the flashlight directly into anyone’s eyes.


